

To check what engine your car has, verify three things: the VIN (factory-assigned engine family), the engine’s stamped code (the exact engine installed in the car today), and the under-hood emissions label (official EPA/CARB engine family and displacement). Matching these three sources gives you the precise engine type for parts, repairs, registration, and emissions compliance.
What You Need to Know Before Checking Your Engine Type
Start with the make and model of a car and the model year from your documents. Many makes and models share a body but offer several trim levels and powerplants. Owners may change the fuel type setup or replace the engine after overheating or a crash. Match what’s in the bay to the records you’ll use for parts and service. You’ll need:
- Phone camera, flashlight, and a rag/soft brush.
- A notepad plus a folder to place the VIN results and photos.
- Access to OEM specs from a reliable source.
Step 1: Decode Your VIN
Using the VIN is a common way to tie your vehicle identification number to factory build data and narrow down the original engine option. Once you decode it, the VIN can reveal additional details that help confirm whether the engine currently in the vehicle matches what the manufacturer originally installed:
- It shows the engine your car left the factory with, which is essential if a previous owner may have swapped or modified the engine.
- Many manufacturers encode distinctions between engines that have the same displacement but different internal designs, helping you avoid misidentifying similar variants.
Which VIN Characters Identify Your Engine
A VIN is an identifier in a 17-character format, but brands assign details differently. Read it through the windshield at the driver’s side dashboard and on the label at the driver’s side door. Copy the vehicle's VIN exactly as shown, and also note the car’s VIN from your registration. The last characters act like a serial number for the build sequence. On many brands, the eighth character points to the engine, so verify it using the manufacturer’s chart from the car’s manufacturer.
| Position | What it often represents | How does it help you confirm the engine? |
| 1–3 | World Manufacturer ID | Confirms maker and region |
| 4–8 | Vehicle attributes | Narrows likely engine choices |
| 8 | Engine option on many brands | Points to a specific variant |
| 10 | Year code | Matches the correct spec sheet |
| 12–17 | Production sequence | Useful for record matching |
VIN formats typically use 17 characters, which keeps lookups consistent across many databases.
When VIN Is Not Enough
VIN review shows how the car left the factory, not what it has now. Even on a new car, an engine can be replaced under warranty. After a failure, a shop may rebuild a unit or install an updated replacement that shares displacement but not every sensor. Paperwork might list only the car engine size, which is too broad. If you can’t confirm which engine is installed from the VIN analysis alone, pull a vehicle history report and verify the stamped code.
- Titles may not record mechanical replacements.
- Some databases show only displacement, not the full code.
- Imports can show different results in regional tools.
Step 2: Locate Your Engine Code

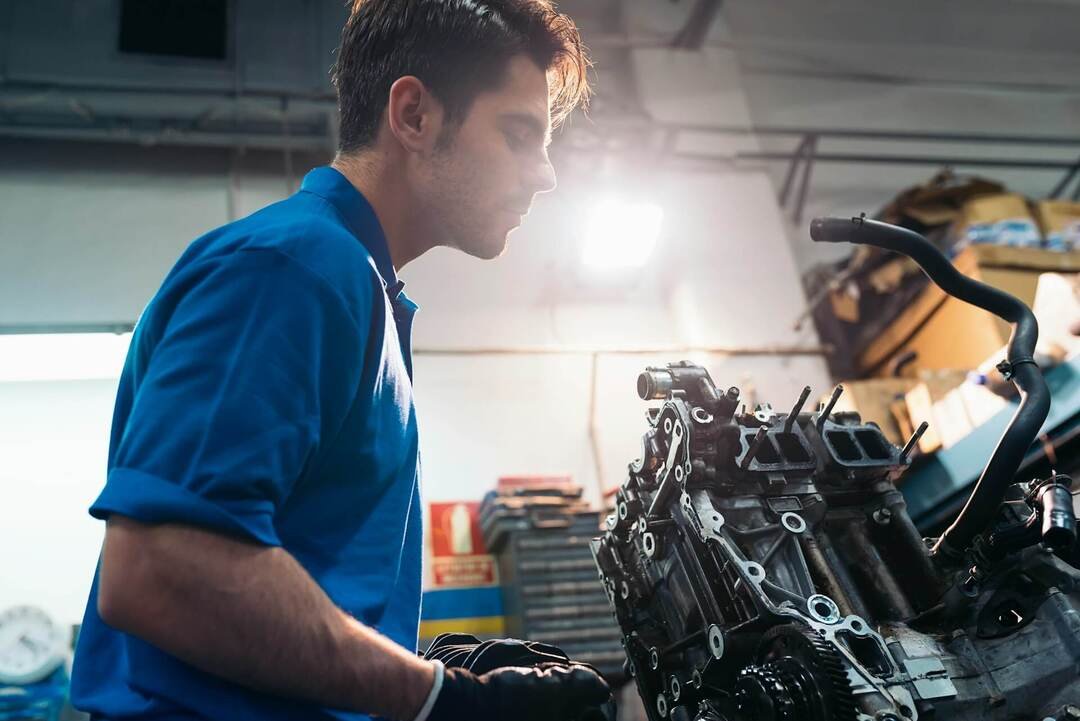
The stamped code is the best proof of what’s in the bay today. To start, look under the hood for a flat, machined surface near the block, head, or valve cover, then clean until the mark is readable and photograph it. Once you find it, match parts.
Checklist: Step-by-step:
- Check common code locations (block, head, valve cover); let the engine cool, then scan around the front and side of the block area with a flashlight.
- Clean the area to reveal stamped/etched characters; clean gently with a rag and solvent until the characters show clearly; move hoses or a plastic cover only if needed, and avoid stressing wiring.
- Photograph the code for documentation; photograph it close-up and take a wider shot showing its location.
- Interpret the code using OEM sources; use an OEM catalog, then compare it to your VIN result and emissions label.
- Verify that the code matches the VIN and emissions label.
- Store code for DMV or insurance corrections.
Engine Codes vs. Engine Size
A code is a precise internal tag; size is a general statement of displacement. That’s why “determine engine size” is not enough to pick parts, and why the size of your engine won’t guarantee the right gasket set. Bigger engines may have many cylinders, and a large engine may still be detuned, but the code keeps parts correct. Boosted versions can produce more power without changing displacement, and according to the SAE J1349 engine testing standard, displacement alone does not identify the specific engine variant.
| Parameter | Code | Size |
| Definition | Internal code label | Displacement volume (often in liters) |
| Precision Level | Exact | Approximate/regulatory |
| Used For | Parts, legal compliance, performance | Comparisons, registration bands |
| Common Misunderstanding | “Same size means identical parts” | “Same badge means same engine” |
On some platforms, engines with the same displacement can vary by 70+ horsepower due to tuning and hardware.
Step 3: Confirm Your Engine Using Physical Labels & On-Car Data
After decoding and reading the stamped code, confirm using physical labels and on-car data. The emissions label under the hood can list family codes and calibration notes, and according to EPA guidance, it is the official source for identifying the certified engine family. It often pairs with a specific transmission type. Some vehicles also display basic powertrain details in menus. Use these checks to confirm the type of engine installed and avoid mixing parts between V4, V6, and V8 variants.
How to Confirm Your Exact Engine (Step-by-Step Checklist)
Step 1 – Record your VIN
Locate the VIN on the windshield and door jamb. You’ll use it to check the factory engine option.
Step 2 – Decode the VIN
Run the VIN through a trusted decoder. Save the report showing the engine family the car was built with.
Step 3 – Find the stamped engine code
Look for the stamped code on the block or head. Photograph it. This code identifies the actual engine installed now.
Step 4 – Check the under-hood emissions label
Read the EPA/CARB label for the engine family and calibration. It must match the current engine setup.
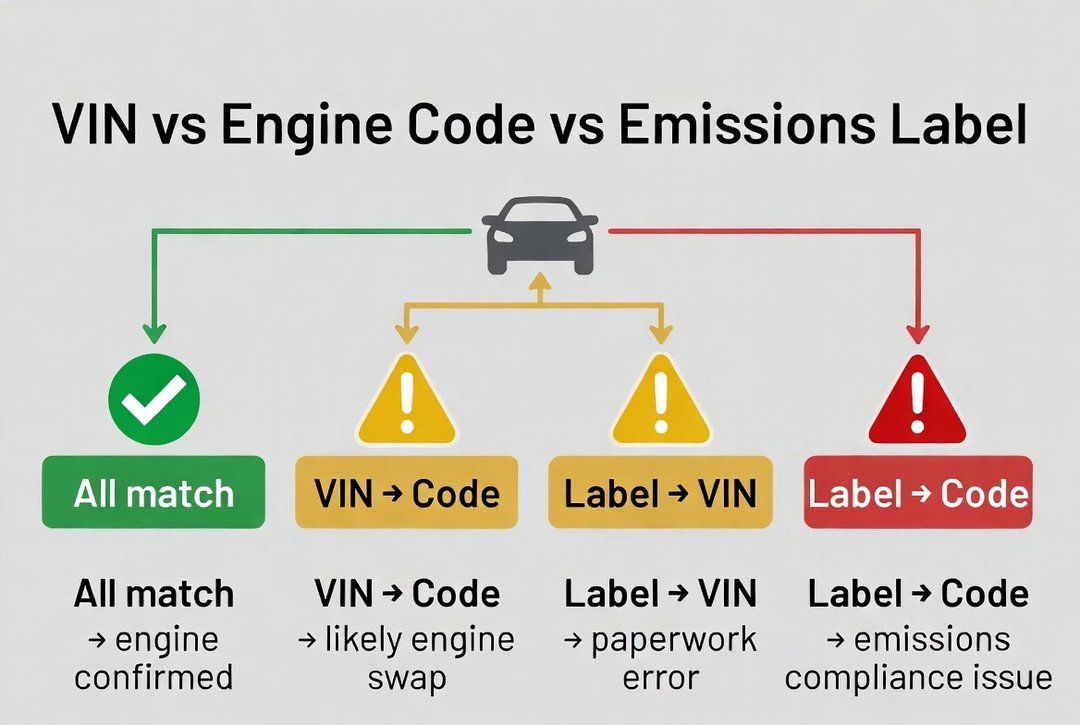
Step 5 – Compare all three sources
Match VIN engine family → stamped engine code → emissions label. Any mismatch suggests a swap or incorrect paperwork.
Step 6 – Document differences
Keep photos of codes, labels, and receipts. This documentation supports DMV corrections, insurance updates, and accurate parts ordering.
Step 7 – Verify fitment in OEM catalogs
Enter the stamped engine code into an OEM parts catalog to confirm the exact parts your engine requires.
How to Verify Engine Accuracy Before Buying Parts
One production year can hide variants with different sensors or spark plugs. Verify with the stamped code and one label match, then compare your photos to diagrams. If you still can’t find a confident match, a dealership can confirm the catalog listing when you provide the code and VIN.
- Find the stamped code and match it to the OEM parts catalog for your year.
- Compare the emissions label family line to the catalog notes.
- Review the piston and ignition layout in your photos against the service manual images.
- Confirm hose and connector locations for air and fuel routing before buying.
- Verify the number of cylinders and your cylinder count layout, and note which cylinder bank feeds which manifold.
Planning Maintenance Based on Your Exact Engine
An owner wants to plan the next year of maintenance and is worried that misidentifying the engine will lead to incorrect oil types, timing components, or interval schedules. They want stability, predictability, and peace of mind.
Their way to find certainty is to cross-check: first interpret the VIN, then locate the stamped code, then confirm with the emissions label and the OEM schedule. With the correct engine information, they can find the right oil spec, map service dates, budget maintenance costs, and reduce the odds of expensive repairs from wrong fluids or missed timing work.
Why Engine Info Doesn’t Always Match Across VIN, Title, and Labels
Small mismatches are common as cars age. The VIN reflects the factory build, but a title may store only the car engine size or a broad category. Labels can be replaced after bodywork, and a lost window sticker may be reprinted without every option. If you have the Monroney sticker (the car’s window sticker), it’s helpful history, but it does not update after repairs.
| Source | What it’s based on | Why can it disagree | Best next step |
| VIN review | Factory build record | Doesn’t reflect later changes | Confirm stamped code |
| Title/registration | DMV database | May store broad specs only | Request a correction with proof |
| Under-hood label | Installed sticker | Can be missing or replaced | Compare to the OEM label format |
| Window sticker | Original option list | Doesn’t update after swaps | Use it alongside physical reviews |
What to Do If You Suspect an Engine Swap or Modified Engine
Don’t guess. Find the stamped code, compare it to the VIN, and inspect mounts, wiring, and exhaust routing for non-factory work. If the code shows a different engine, document changes with photos and receipts before ordering parts. To confirm the swap fully, check for mismatched sensors, altered ECU programming, or non-OEM brackets that indicate the engine wasn’t installed at the factory. Verify that the emissions label still corresponds to the current engine, since a mismatch can affect inspections, registration, and parts compatibility.
How a Swapped Engine Affects Insurance, DMV, and Resale
A swap can affect insurance, registration, emissions, and resale value. Insurers may rate risk differently if output changes, and some regions require proof when the engine family changes. Resale is easiest when you can show consistent records, photos, and test results that match the current setup, including changes that affect fuel economy.
| Area | What can change | What to keep on file |
| Insurance | Declared mods and valuation | Receipts, photos, disclosure notes |
| DMV | Spec fields in the record | Inspection form, stamped code photo |
| Emissions | Test class and equipment | Label photo, test results |
| Resale | Buyer trust and pricing | Work orders and parts list |
How to Fix Engine Identity Errors in Your Official Documents
If your documents list the wrong engine, fix it before selling. Collect proof from the car: code photos, label photos, and invoices. Run a VIN decoder to print the factory configuration, then show why the current motor differs if it was replaced. If you bought the car from the dealership you purchased, ask for records that list the installed unit. It supports the engine your vehicle has. For title or record corrections, check your state’s DMV requirements to confirm which fields they can update and whether an inspection is needed.
- Bring photos showing the stamped code and the emissions label.
- Add invoices that show replacement parts and labor.
- Include your analysis printout.
- Ask the DMV what field they can correct and whether an inspection is required.
Summary

- Use three sources to confirm your engine: start with the VIN, verify the stamped engine code, and cross-check the emissions label.
- Treat the engine code as the primary truth: when information conflicts, the stamped code outranks the VIN, title, or old paperwork.
- If the data doesn’t match, follow a clear path: re-check the block stamp, read the emissions label, verify the VIN decode, and contact your DMV if needed.
- Update your documents when required: correct the title if engine info is wrong, notify your insurance provider, and in some states update your emissions or inspection records.
- Use the engine code to plan repairs: it helps you compare part options, get accurate repair estimates, and avoid costly mistakes caused by ordering parts for the wrong variant.
- Know when to involve a mechanic: get professional confirmation if you suspect an engine swap, the codes are missing or unreadable, or your VIN and labels conflict.
- Keep the correct engine data for future maintenance: oil specs, timing components, spark plugs, and service intervals all depend on the exact engine.
Frequently Asked Questions
Yes. Owners may install a replacement after a failure or upgrade and never update records. In automotive paperwork, databases often track ownership better than mechanical changes, so verify the code and labels yourself.
Factory originality is easier to judge when several details line up. Here are some steps to follow:
- Compare the stamped code to the VIN review and build data.
- Look for consistent fastener finishes and factory sealants.
- Check for adapter plates, custom mounts, or cut wiring.
- Verify sensors and emissions equipment match the label.
- Ask the dealership for the service history if the car was serviced there.
A code identifies a specific variant for parts and service, while an engine family code is broader and used for certification. One family can include several codes that share an emissions strategy but differ in hardware.
Yes. If the installed engine and emissions equipment don’t match what the test expects, you can fail readiness or a visual inspection. Even a correct unit with wrong sensors can trip faults and cause repeated visits.
Not always, because one manual often covers several trims and options.
- Use it for general fluid specs and procedures, not the exact code.
- Confirm the stamped code on the engine and the under-hood label.
- Cross-check with service records if needed.